Microsoft IIS 7 SSL Certificate Installation and CSR Generation Guide
Installing a Secure Sockets Layer (SSL) certificate on Microsoft Internet Information Services 7.x is easy with the new user interface, but is often confusing for those new to IIS 7. Getting the certificate for Microsoft IIS 7.x begins the same way no matter what the vendor is providing the certificate; the first step is to create a Certificate Signing Request (CSR) on the IIS server.
Articles contain all steps of Creating CSR for IIS 7.x and the installation process of an SSL certificate on Microsoft Window Server 8 computer.
Initially, we look into the process of Certificate Signing Request (CSR) generation process as it is the first step when we decide to install an SSL certificate on any web server.
Generation of Certificate Signing Request for IIS 7.0 SSL certificate
Step 1: The first step in process of CSR generation is that move to the “START” menu, then go with the option “Administrative Tools” and then click on the subsidiary option Internet Information Services (IIS) Manager.

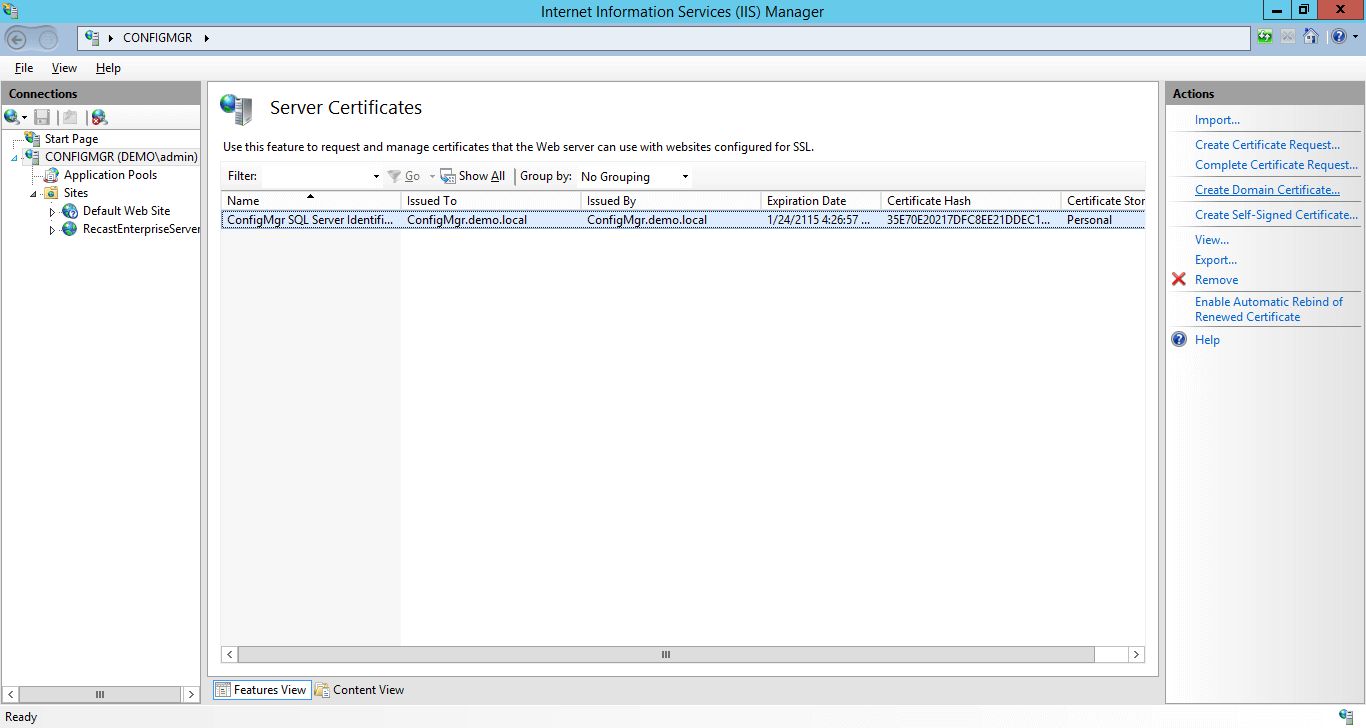
Step 2: Click on the listed Server Name at the left-hand side in the “Connections” column and then double click “Server Certificates” in the middle area of Server
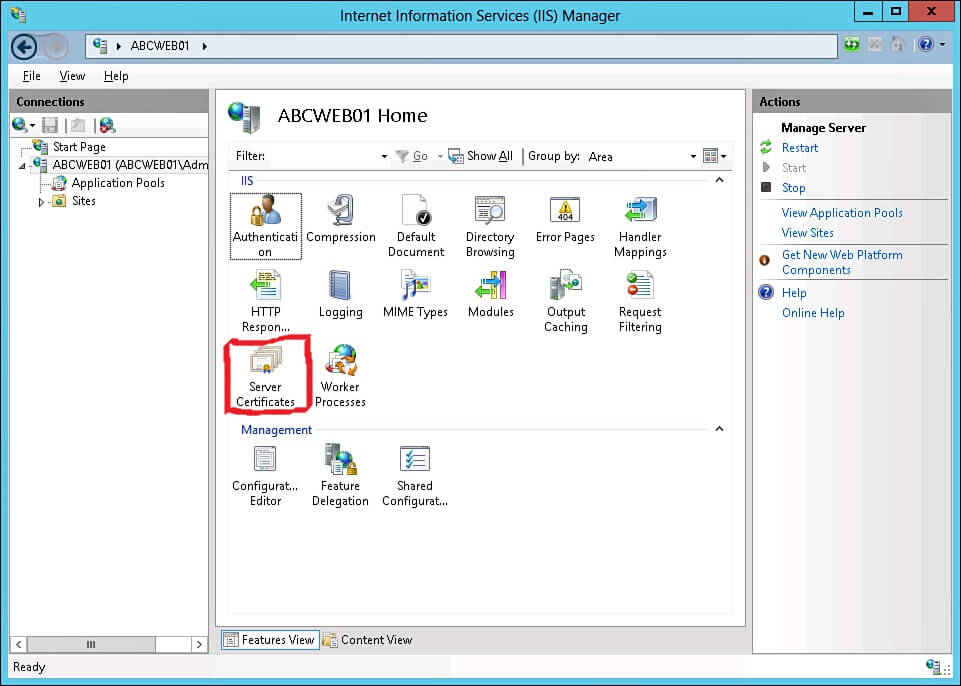
Step 3: Now click on the very first option on Right-Hand side on “Create Certificate Request”.
Step 4: Now, enter all the required information in the pop “Request Certificate” which includes common name (domain name), organization name, department (unit), city, state, & country. After filling all this information in the proper formation click on the “Next” button.
Note: Make sure that you add all this information very carefully. For example;
- Common Name: *.domainname.com, mail.google.com
- Organization: Domain Inc.
- Organization Unit: Wen Security
- City/Locality: Mountain View
- State/Province: California
- Country/Region: US, GB
Step 5: Choose the level of Cryptography Server Provider. Advisable keep as it as default level such as “2048” or higher as it’s the standard level of Cryptography.

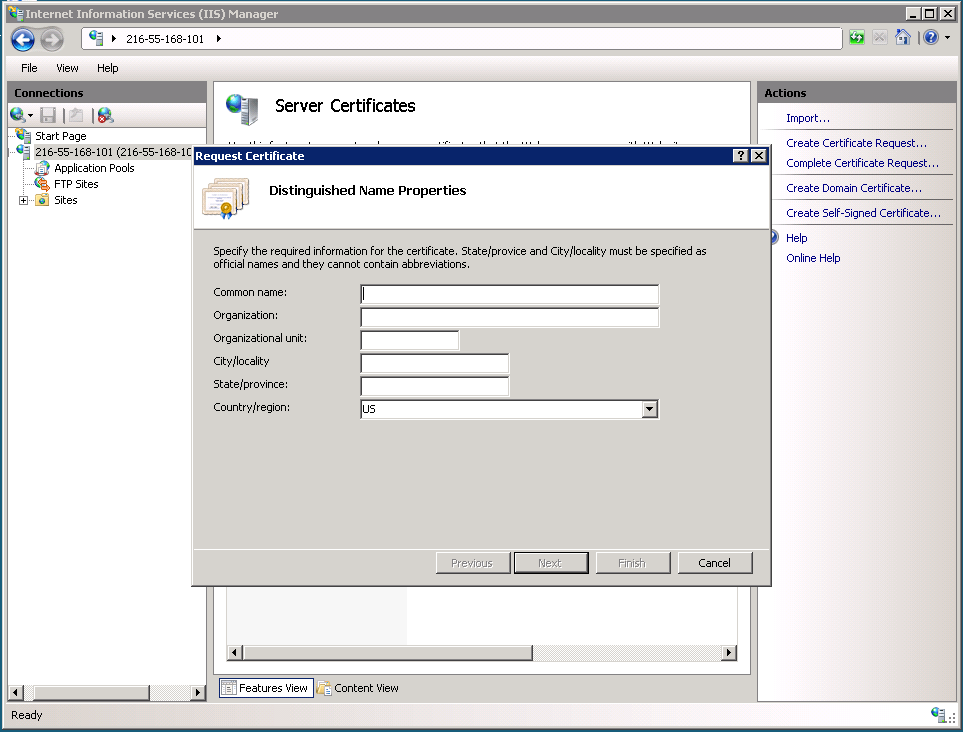
Step 6: Now, it’s time to choose the path where we want to save our CSR file on the computer. Please click on the button next to the text column and choose the path where you want to store the CSR file and then click on the “FINISH” button.
The following above step was the last step to generate a CSR certificate, once you complete the process of Certificate Signing Request now you are eligible to order a certificate from any Certificate Authority such as Symantec™, GeoTrust®, RapidSSL™, and Thawte™. If you are not sure which certificate would be the best option for you then compare SSL certificates for their types, prices, features, encryption, warrant, and the most crucial option support. However, if the comparison chart will not make you sure about your certificate requirement then go through individual types such as Wildcard SSL Certificates, EV SSL Certificates, and Cheap SSL Certificates.
Once you decide about your certificate then you can use CSR while ordering the certificate and then Certificate Authority will validate your information and then they issue your certificate.
Now, Let’s Move to Installation Process of SSL Certificate on IIS 7.00
If you are installing a newly purchased SSL certificate then you first must copy and store the file on the server and then start with the installation process.
Step 1: One more time go with the “START” button and then “Administrative Tools” and then click on the subsidiary option “Internet Information Services (IIS) Manager”
Step 2: Now, again click on the server name which is exactly left-hand side under the option called “Connections” and then click on the “Server Certificates” option in the middle part of “Internet Information Services (IIS) Manager”.
Step 3: Now, on the right-hand side click on the second option called “Complete Certificate Request”
Step 4: Now import your certificate using its stored path. Just click on the button next to the text area and choose the certificate which you have received from Certificate Authority. Enter Friendly Name for future reference so you can track the certificate on the following server. Finally, click on the “OK” button.
Step 5: If your installation was done successfully then your certificate will list in the option “Server Certificates”. If due to any cause you get any issue such as certificate miss-match error, the private key is missing or request of the certificate not found then in those cases you have to re-issue your certificate with a new Certificate Signing Request (CSR). Make sure that you use the same CSR that you have generated for the certificate.
Finally, you have done with the SSL installation process on Microsoft IIS 7.X. However, it’s always advisable to check Certificate Installation through SSL certificate checker free SSL tools which are available globally on the Internet for Free. It’s always advisable to double-check certificate installation from authority and that’s why we have added some external important sources to help you more in installation. Please check your certificate through SSL tools and confirm that everything seems fine! Wish you good luck!